macOS: Delete .DS_Store files to reset folder settings

The following command will:

  • Only delete .DS_Store files
  • Only in the folder you choose (not its subfolders)
  • Not require your password
  • Not touch system files

In order to run the following commands, the Terminal will have to have access to your storage devices. Read this blog post to learn how to enable Full Disk Access for Terminal.

Step-by-Step Instructions:

  1. Open Terminal
    Press Command + Space, type Terminal, then press Return.
  2. Type find, then a space. Don’t press Return yet.
  3. Drag the folder into the Terminal window.
    This automatically inserts the correct file path — even if the path contains spaces or it’s on an external drive.
    For example, it might look like this:
    find /Volumes/My\ External\ Drive/Some\ Folder
    (You’ll see backslashes \ before spaces — that’s normal.)
  4. Complete the command by adding this to the end:
    -maxdepth 1 -name .DS_Store -delete
    So the full command might look like:
    find /Volumes/My\ External\ Drive/Some\ Folder -maxdepth 1 -name .DS_Store -delete
  5. Press Return. That’s it!
    If there’s a .DS_Store file in that folder, it will be deleted instantly. You won’t get a confirmation message — Terminal just does it.

Quick note about paths:

In the Terminal, spaces are used to separate parts of a command — like the command itself from the options and file or folder names. So if a folder is called My Folder, typing it without any special formatting (like My Folder) will confuse the Terminal into thinking you’re referring to two separate things (“My” and “Folder”). To fix this, you can escape the space with a backslash (\), like this: My\ Folder. This tells the Terminal, “treat the space as part of the name.” Another option is to wrap the entire path in quotes, like "My Folder", which also works. But important: don’t combine the two — a backslash inside quotes (like "My\ Folder") will not work and will actually break the command. Use either backslashes or quotes, but not both.

Examples:

Deleteing “.DS_Store” from the Desktop folder:
find ~/Desktop -maxdepth 1 -name .DS_Store -delete

Deleteing “.DS_Store” from the Documents folder:
find ~/Documents -maxdepth 1 -name .DS_Store -delete

External drive folder (just drag the folder in):
find /Volumes/My\ USB\ Stick/Project\ Files -maxdepth 1 -name .DS_Store -delete

What this does NOT do:
It does not delete anything else.
It does not go into subfolders (so it’s very safe).

On macOS: Enable Full Disk Access for Terminal

This article explains how to enable Full Disk Access for the Terminal application on macOS
(So You Can Safely Work with All Files Even Hidden or Protected Ones)

Why would you do this?

macOS protects certain files and folders (like Mail, Safari, external drives, and some hidden system folders) by default. If you run a command in Terminal and it doesnt seem to work or skips some files it might be because Terminal doesn’t have Full Disk Access.
Giving Terminal Full Disk Access lets it do what you tell it to

Step-by-Step: How to Enable Full Disk Access for Terminal

  1. Open System Settings
    Click the Apple menu in the top-left corner.
    Choose System Settings (or System Preferences on older macOS versions).
  2. Go to Privacy & Security
    In the left-hand sidebar, scroll down and click Privacy & Security.
    On the right side, scroll down until you see Full Disk Access and click it.
  3. Add Terminal to the list
    Click the + (plus) button at the bottom of the list.
    A file picker will appear. Press Command + Shift + G (or navigate manually).
    In the “Go to the folder” box, type:
    /System/Applications/Utilities/
    Press Return, then select Terminal.app, and click Open.
    You’ll now see Terminal in the list, with the toggle turned on (or you’ll need to turn it on yourself).
  4. Restart Terminal (just to be safe)
    Activate the Terminal app, the quit the Terminal app completely (press Command + Q while its focused).
    Then reopen it as normal.

Important Notes:

You only need to do this once.
This does not give Terminal uncontrolled access to your Mac it just lets you, the user, tell Terminal to access protected folders if needed.
Of course, still be very careful with commands when Full Disk Access is enabled Terminal can now read/write more files than before, especially commands you copy from pages on the internet!

Special security note example:

Copy-pasting curl commands from the internet can be extremely risky because they can download and run unknown code on your system sometimes with full permissions. For example, a popular and benign command to install Pi-hole looks like this:

curl -sSL https://install.pi-hole.net | bash

While this works and is safe if you trust the source (in this case the developers of pihole), you’re essentially letting a remote server run code on your computer without seeing what it is first. A malicious site could do the same but install malware, steal data, or damage your system.

Note: The | symbol (this is not the uppercase letter I as in Ian or the lower case “l” as in letter) is called a pipe, it takes the output of one command (in this case, the download from curl which is a script that handles the full installation of the pi-hole service!) and feeds it directly into another command (bash), which runs it. This is powerful but highly dangerous if misused.

Hide Logic Project File Extensions

Apple Logic Pro project bundles normally end in .logicx. If this extension is visible in Finder, it clutters the file name and looks odd when you are doing a quick Save As… during a session. The tiny helper below walks your project drives and toggles the hidden extension flag so that Logic’s bundle appears extension-less in Finder.

TL;DR – Drop the script somewhere on your drive, make it executable, then schedule it in LaunchControl to run every few minutes. Your projects will stay tidy automatically.


Why?

Logic’s default behaviour is to hide the extension for new projects, but there are plenty of ways for it to re-appear (cloning projects, copying between volumes, third-party utilities, expanding .zip archives etc.). Manually hiding the extension file-by-file quickly becomes a drag.

What the script does

  1. Walks one or more directories (your project drives) up to eight folders deep.
  2. Finds anything that matches *logicx (Logic project bundles).
  3. Skips files that are locked (immutable flag set).
  4. Runs the SetFile -a E command to mark the bundle’s extension as invisible.

That’s it.


Prerequisites

  • macOS (tested on Ventura & Sonoma)
  • Xcode Command Line Tools (provides the SetFile utility)
  • LaunchControl – the easiest way to schedule background jobs on macOS. (Technically optional, but strongly recommended.)

Installation / Setup

  1. Install LaunchControl if you don’t have it yet.
  2. Save the script below as hide_logic_extension.sh somewhere convenient (e.g. ~/Scripts). Adjust the DIRECTORIES array so it points at all your Logic project volumes.
  3. Make it executable:
   chmod +x hide_logic_extension.sh
  1. Create a new Launch Agent in LaunchControl that calls the script every few minutes. (In LaunchControl ? New ? User Agent, point Program to the script and set a simple start interval, e.g. 300 s.)

If you prefer the command line, you can craft your own plist and load it via launchctl, but I’ve found the GUI to be far less brittle.

Script contents

#!/bin/zsh

# Path to SetFile – part of the Xcode CLT package
SETFILE="/usr/bin/SetFile"

# Directories to search – EDIT THIS
DIRECTORIES=(
    "/Volumes/DRIVE-1"
    "/Volumes/DRIVE-2"
)

for DIRECTORY in "${DIRECTORIES[@]}"; do
    echo "Processing directory: $DIRECTORY"

    # Find files matching *logicx (Logic project bundles)
    find "$DIRECTORY" \
        -not -path "*.Trashes" \
        -not -path "*.DocumentRevisions-V100" \
        -not -path "*.TemporaryItems" \
        -maxdepth 8 \
        -name "*logicx" | while read -r file; do

        # Skip locked files/bundles
        if ls -lO "$file" | grep -q 'uchg'; then
            echo "Skipping locked file: $file"
        else
            "$SETFILE" -a E "$file" && \
            echo "Modified: $file" || \
            echo "Failed to modify: $file"
        fi
    done

done

LaunchControl settings

Below is a screenshot of a minimal configuration that runs the job every five minutes. (Replace with your own once you have the script in place.)


What if I don’t want LaunchControl?

You can absolutely roll your own plist:

<!-- ~/Library/LaunchAgents/com.example.hide-logic-extension.plist -->
<plist version="1.0">
  <dict>
    <key>Label</key> <string>com.example.hide-logic-extension</string>
    <key>ProgramArguments</key>
    <array>
      <string>/path/to/hide_logic_extension.sh</string>
    </array>
    <key>StartInterval</key> <integer>300</integer>
    <key>StandardOutPath</key> <string>/tmp/hide_logic_extension.log</string>
    <key>StandardErrorPath</key> <string>/tmp/hide_logic_extension.err</string>
  </dict>
</plist>

Load it with:

launchctl load -w ~/Library/LaunchAgents/com.example.hide-logic-extension.plist

…but I still recommend LaunchControl for the peace of mind.


Wrap-up

Enjoy cleaner project names! If this saved you a few clicks, you can buy me a coffee ?? and keep the caffeine flowing.

Install Xcode Command-Line Tools (macOS)

Many small macOS scripts and developer utilities rely on Apple’s Command-Line Tools for Xcode package. Among other things, it ships:

  • gitsvn, and other version-control binaries
  • clang & friends for compiling C/C++/Obj-C
  • makeldstriparnm, …
  • SetFilePlistBuddy, and dozens of helper tools used in shell scripts

If you ever tried to run git on a fresh Mac and saw a dialog asking to “Install Command Line Developer Tools”, this is what macOS was talking about. Below are three quick ways to get them.

Time required: ? 2 – 3 minutes on a fast connection (700 MB download). No Apple-ID sign-in needed unless you prefer the full Xcode route.


1. One-liner in Terminal (fastest)

  1. Open Terminal.app (? Space ? Terminal).
  2. Run:xcode-select --install
  3. A small dialog appears – click Install and accept the license.

That’s it. After the installer finishes you can verify with:

xcode-select -p   # ? /Library/Developer/CommandLineTools
clang --version    # should print Apple clang …

2. Via the full Xcode app (App Store)

Installing the full 20 GB Xcode bundle also drops the command-line tools on your system. Choose this path only if you plan to use the Xcode IDE.

  1. Open the App Store and search for Xcode.
  2. Click Get / Install (Apple-ID required).
  3. Once Xcode finishes downloading, open it once so it can install its components.
  4. Verify:xcode-select -p # ? /Applications/Xcode.app/Contents/Developer

3. Manual .pkg download (offline machines)

Apple hosts standalone installer packages on the Developer website:

  1. Sign in at https://developer.apple.com/download/all/?q=command line tools (free account).
  2. Download the DMG that matches your macOS version, e.g. Command Line Tools for Xcode 15.3.
  3. Mount the DMG and double-click the .pkg inside.

Accepting the license non-interactively

Scripting a fleet of Macs? After installation run:

sudo xcodebuild -license accept

This pre-accepts the license so build systems won’t hang waiting for T&C confirmation.


Uninstalling (rarely needed)

To remove the standalone tools:

sudo rm -rf /Library/Developer/CommandLineTools

Then reinstall with xcode-select --install whenever you need them again.

?? Do not delete if they live inside Xcode.app – use Launchpad or Finder->Applications to remove Xcode instead.


Troubleshooting

• “Command line tools are already installed, use Software Update to install updates.” – They’re present; run softwareupdate -l to check for newer versions.
• xcode-select: error: command line tools are already installed, use Software Update to install – same as above.
• git: command not found even after installing – Open a new Terminal window or run hash -r to refresh your shell’s path cache.


Wrap-up

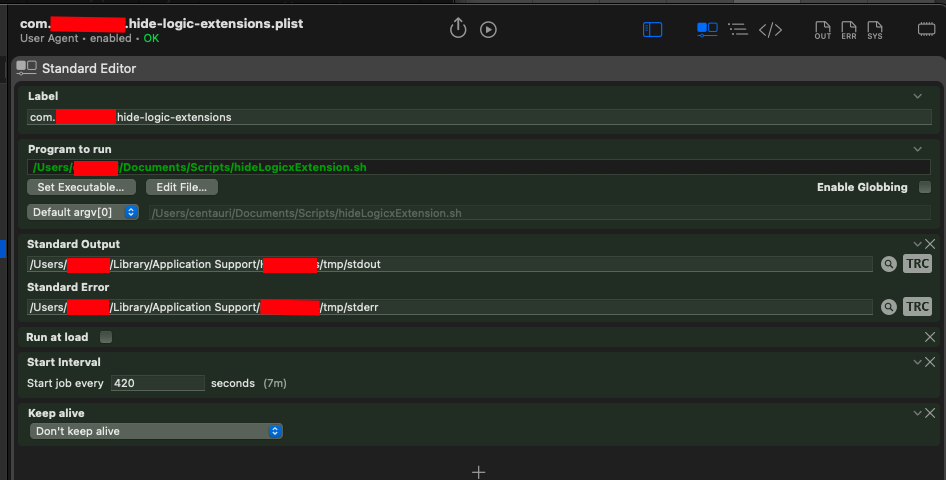
You now have Apple’s developer toolkit on your Mac. Most of the scripts in this repo (including the Hide Logic Extension helper) will “just work” from here on.